How to Make Blog Website (step by step) Guide in 2023
In this article, we will learn how to start a blog website from scratch. Now a days creating a blog website is not difficult. You can create a blog website without knowing either a single word of coding. It means you can make any kind of blog website without having technical knowledge
Table Of Content
- What is a Blog?
- What is Blogging?
- Who is a blogger?
- Why Blogging is so important now a days?
- What did I need to start a Blogging Website?
- Why should I go for a premium theme?
- How to install our WordPress News Portal Free theme
Before we start the complete setup of the blog website. We should know some basics
What is a Blog?
A blog is a piece of informative and descriptive information that is published on a website to help People Online.
What is Blogging?
The activity of writing a blog is known as blogging.
Who is a blogger?
And the person who is involved in writing a blog is known as a blogger.
Why Blogging is so important now a days?
Blogging provides descriptive written information to people who want to get updated with the latest technology and its updates. It can be used for various purposes like providing information to customers, building brands, news; and can be used to make money (using affiliates)
What did I need to start a Blogging Website?
You just need a domain like gomahamaya.com and one hosting account for storing all your website data and files. And we are going to use WordPress software To make our website without coding (open source) which is completely free (open source)
And now we will start to learn, how we can build a blogging website from scratch
STEP 1: Purchasing of domain and Hosting
Purchase of domain and hosting – We are choosing Hostgator as our hosting partner. Hostgator hosting is fast, reliable, and with a great support system. Even we are getting 60% off with the first signup
—–<<<<<<<<<< click here to redeem >>>>>>>>————— and apply (HOSTCOUPON60) To get 60% off with Hostgator hosting account. You will get a discount on a domain. actual costing for domains is $15 and you will get it for just $4.99
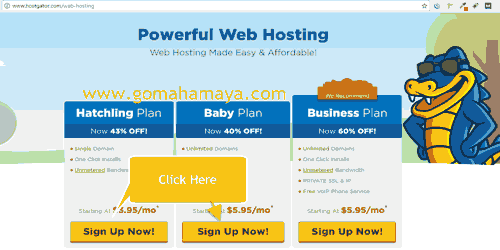
Now Click You need to choose the plan either you want to go for hatching plan or baby. If you want to host or set up more than one website you need a baby plan and if you want to host you should choose a hatching plan and now click on signup
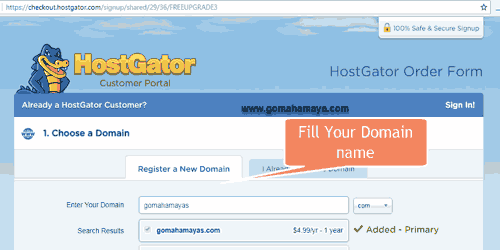
Once you click on any one of the plans you will be redirected to the Hostgator domain selection page write down the name of your domain
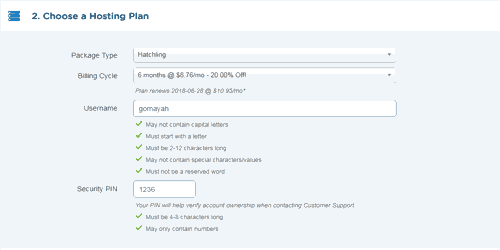
Now scroll down and choose your hosting plan. Its Better you go for a hatchling plan (best plan for beginners) and select the duration for your hosting (6 months recommended)
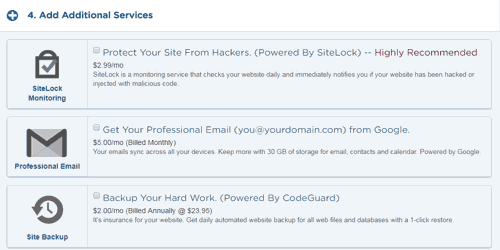
And Now enter your billing details. In additional services unchecked all options. All those options are wastage of money
Now you need to enter a coupon to avail discount. Hostgator coupon code is HOSTCOUPON60 and you will get 60% off.
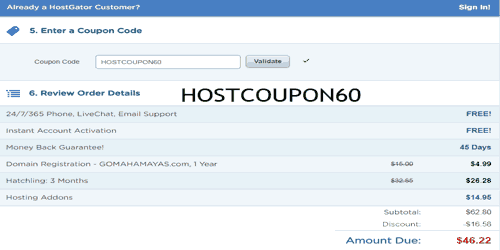
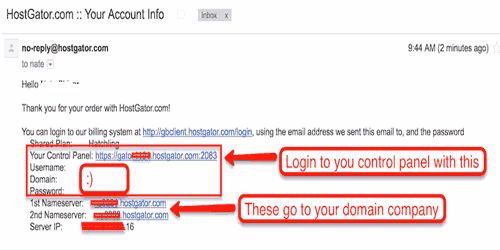
Now make The payment. Once the payments get completed you will receive an email with cPanel login credentials
STEP 2: How to install WordPress
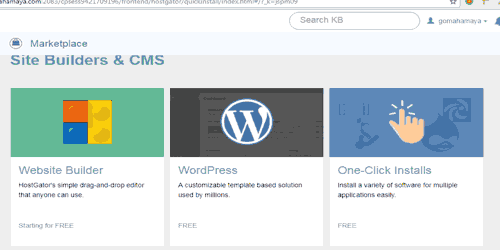
For installing WordPress You need to log in with your given cPanel login credential. Once you are logged in you will find a bunch of options. Don’t worry keep on scrolling down and inside the software section, you need to find Quickinstall. click on Quickinstall
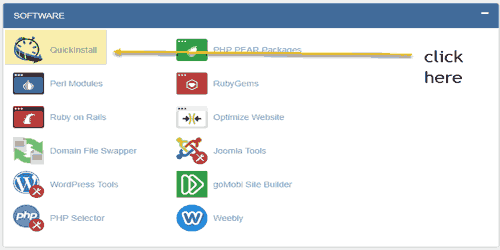
Once you click on Quickinstall you will be redirected to Site Builders & CMS option. Now again click on WordPress
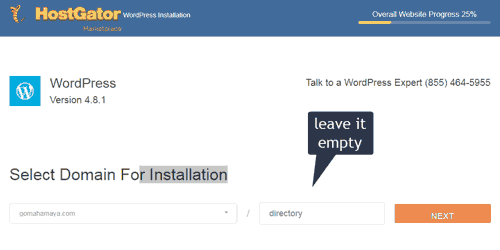
Once You click on WordPress you will be redirected to the Select You domain area. Select your domain and click on next don’t fill any directory
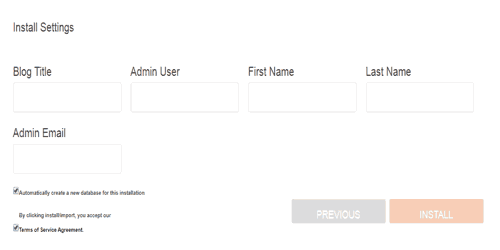
On the next page you need to write down your blog title, admin user (for login), first – last name, and admin email id. You need to agree with all tnc of Hostgator then click on install
After installation, you will get a successful installation message with a login user name and password. you will receive an email too.
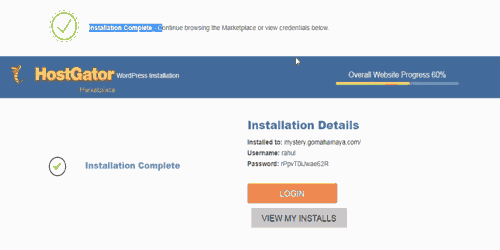
Click on the given link to login to your WordPress installation or you can write like your domain name /wp-admin and you will be redirected to wp-admin. for example – gomahamaya.com/wp-admin
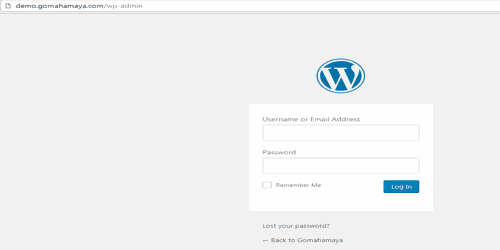
Now your WordPress got installed and you are ready to start your blogging
STEP 3: WordPress Theme Selection
When you install WordPress for the first time you will get the latest WordPress theme installed which will be 2019. The basic appearance of our website is managed by our website theme which includes so many things like color, style, fonts, header, etc.
In WordPress we have 2 sets of options:
You are always free to choose your website theme. I always recommend premium themes for everyone.
Why should I go for a premium theme?
The reason behind the premium theme is They are highly optimized concerning SEO and loading speed.
Top Premium Blogging themes are:
You can try this link if you want to know how to install a premium WordPress Theme << click Here >>
Now I will discuss the Free theme which we are using for our blogs. The Theme I am using for our blogs is ” News Portal “. However, This theme also has an awesome Premium version. I am using the Premium version of ” News Portal ” for one of my clients. Trust me this theme is awesome
How to install our WordPress News Portal Free theme
You can change your theme by going to your WordPress dashboard and clicking on Appearance » Themes. Click on add new button
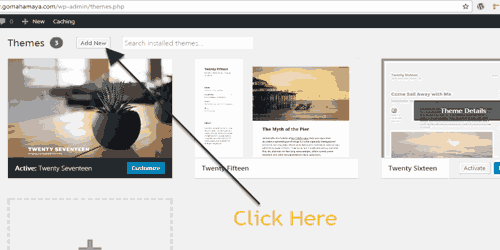
Then you will be redirected to WordPress Free theme directory. In that section, you need to type ” News portal ” In the search bar 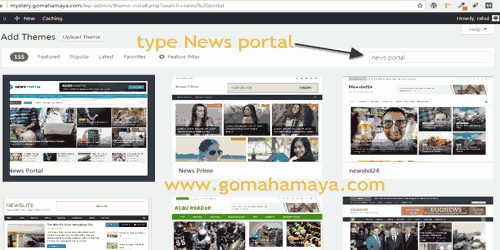
Then You need To click on the Install Now Button. And then you need to activate the theme
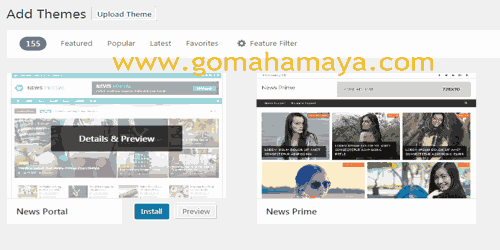
.
Now your WordPress Theme got to install and you are ready to start a blog
Handpicked more related articles for you
Best Cache Plugins WordPress 2018

